Part 5 – Final touches
Sun, 4 May 2008 — BAS Admin
- You have done the hard work, now you can have fun getting your gallery just how you want it.
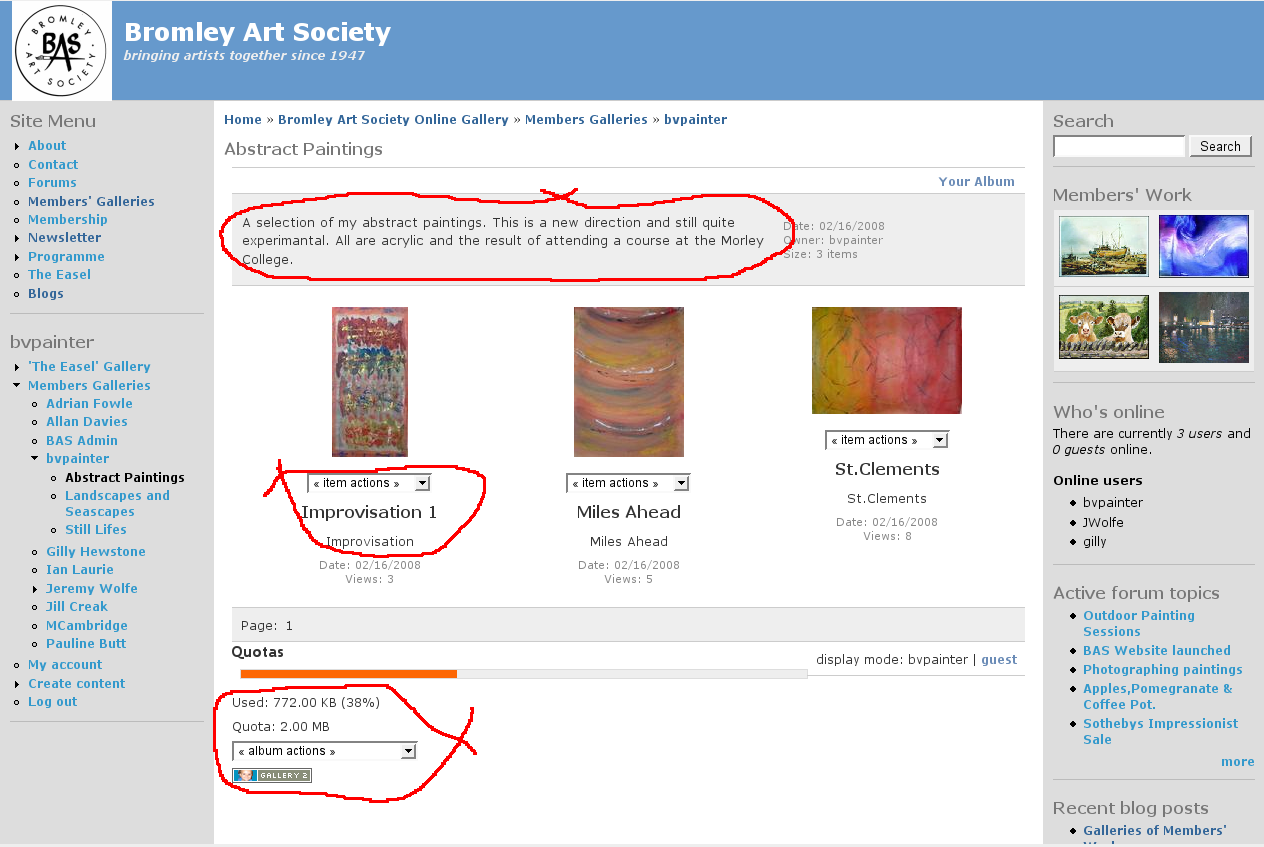
- Have a look to see what other people have done with their galleries. It is a nice touch to tell people a little about yourself and your gallery as a whole, and about the individual paintings. BVPainter and Jeremy Wolfe are two examples. Don't be afraid to experiment and see how things look – you can always change them again.
- You are welcome at any time to delete your pictures and put different ones in their place.
- Select your gallery to begin work on it. Your gallery consists of at least one album, but you can nest them one inside another like the directories or folders on your own computer. Each album can contain pictures. At the bottom of the gallery section is a drop down menu of “album actions” for the current album. You will also see your quota of file space and how much you have already used. Underneath each sub-album or picture is a drop down menu of “album actions” or “item actions”, which affect only that album or picture, and a summary of the picture. At the top of the screen shot you can see a few lines of text which is the description of the album.
- When you edit an item, i.e. picture, you will see something like the following screen shot There is something similar for albums, with a few extra options. There is a main menu on the left – most of the time you will only want the “Edit Photo” option. When this is selected, explore the items on the menu tabs across the top. On the first one “General” you can select the Title, Summary and Description of the item.
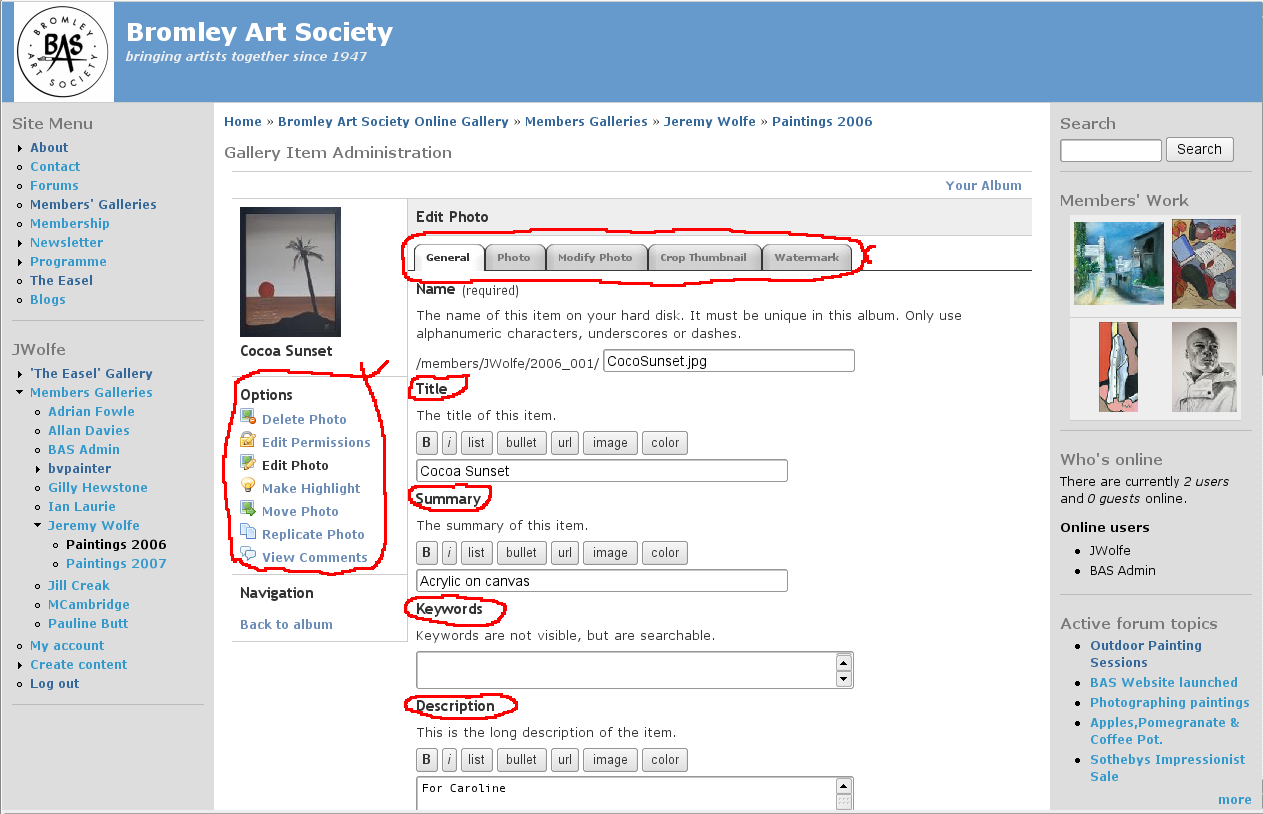
- The “Make Highlight” menu option makes the current picture the icon for the album as a whole. On the album menu you can choose instead to have a random highlight / icon. On the whole it is best not to make other radical changes without discussion with the webmaster!
